
One of our guests this last week was Sam Williams, the Area Ag. Specialist. He had our Stake Garden Specialist and the Country Welfare Manager over to the Learning Garden to give them some training on how to create a Key Hole Garden. They solicited a couple of helpers from the neighboring village to help them and set to work with working/training and building these unique plots on which to grow vegetables.

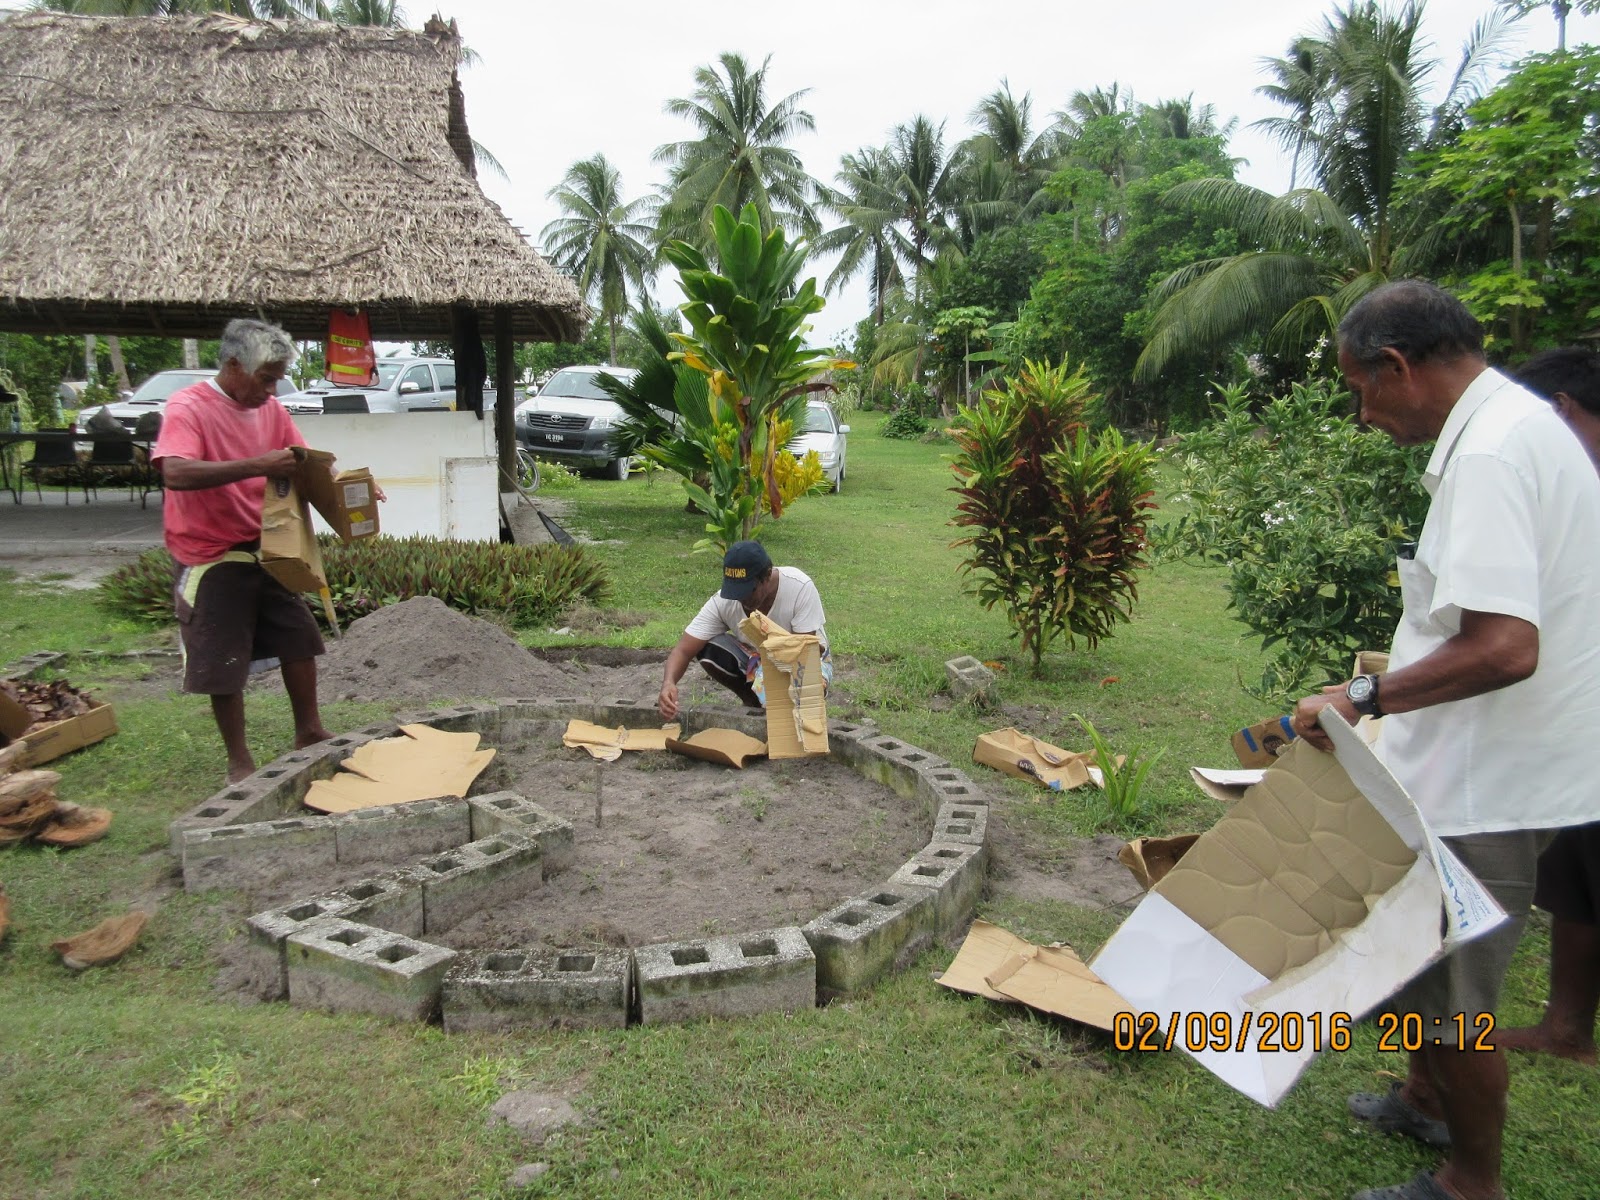
See them here with the bottom all filled with dirt and now tearing up pasteboard boxes. The paste board is placed all over the floor of the garden and has three purposes: First, it keeps the weeds down. Second, as it rots it becomes good compost for the soil. Finally it creates a basin to contain the water so that it doesn't just dissipate into the ground. Sand has a bad habit of letting the water just go through. The longer you can keep the moisture in contact with the roots, the better. Also, when I say dirt, I mean sand. There is no dirt here.

They are doing a nice job creating that barrier layer in preparation for the next layer.

 Now, get a jag of good topsoil, or in our case, we pepped up some sand with chicken manure and any kind of organic material we could find to make the sand be as fertile as possible. Start shoveling the sand/dirt on top of the compost material and fill it up to about 18-24 inches high, again with the tallest part in the center and sloping down to the edges. These fellows are tearing the fiberous matter out of the coconut husks (cocopeat) to fill the bottom of the basket to act as a sponge for when you water.
 Shovel it on plenty thick and stack it up around the basket.
Here is the finished product. This one uses coconut husks instead of cinder blocks. It is the poor man's version because there are all kinds of coconut husks around. Cinder blocks, on the other hand, are $1.70 a pop and the one above took 21 blocks. That is about 35 bucks and is a daunting figure for folks in these parts. Notice the basket is where you put all your organic table scraps. Also any kind of fertilizer you may need to add. When you water it, put the water down the basket as well. It washes the nutrients down the center of the garden and spreads them out evenly to the edges "under" the sand layer on top. The roots will grow down to the water level that is contained by the compost material and the pan created by the pasteboard. When you harvest your vegetables, put the leaves back in the basket and they become compost as well. The basket also serves as a standard for tomatoes, beans or what ever grows on vines. When you get done with a cycle, just put the left-overs
in the basket and plant it again. Here you get several growing cycles per year. Utah? Not so much. It conserves space, water, regenerates soil--pretty nifty idea.

Pictured above are from left; E Waldron, Turian, Pres. Tune, Pres. Sam, Peter, laborer, Tioromaea, and Sam Williams. Two great days at the garden and they created three or four of these plots. You can plant them immediately. He says the second crop is better than the first and so on because of the recycling of the plant matter for compost. It rejuvenates the soil. Any of you who are gardeners at home might try this. They go up really easily.